Introduction
If your refrigerator is forming frost buildup or not cooling properly, the defrost system may be at fault. Understanding how to repair refrigerator defrost systems can save you time, money, and frustration. A malfunctioning defrost system leads to uneven cooling, food spoilage, and energy waste. This guide provides expert advice and step-by-step insights to help you troubleshoot and fix defrost problems like a pro.
Understanding the Refrigerator Defrost System
Modern refrigerators automatically defrost themselves using an integrated system designed to prevent ice buildup on the evaporator coils. The system typically includes three main components — the defrost heater, the defrost thermostat, and the defrost timer or control board. Each plays a critical role in maintaining consistent cooling.

When any of these parts fail, frost begins to accumulate inside the freezer, blocking airflow and reducing cooling efficiency. Learning How To Repair Refrigerator defrost systems starts with identifying which part is malfunctioning.
Common Symptoms of a Faulty Defrost System
Recognizing the warning signs early helps you act before the issue worsens. Some of the most common symptoms include:
-
Ice or frost buildup on the freezer walls
-
Water leaking inside the refrigerator compartment
Digital Ranker ADS Digital Ranker
ADSAdvertise Across 200+ WebsitesWorldwide TrafficSTARTER$997 DaysBUSINESS$19915 DaysPREMIUM$39930 DaysENTERPRISE$79930 Days✓ 200+ WebsitesAdvertise Now
✓ Banner Ads
✓ Sponsored Posts
✓ Homepage Ads -
Inconsistent temperatures between the fridge and freezer
-
Refrigerator running constantly but not cooling efficiently
-
Unusual noises during the defrost cycle
If these symptoms sound familiar, your next step is to inspect each defrost component to locate the problem.
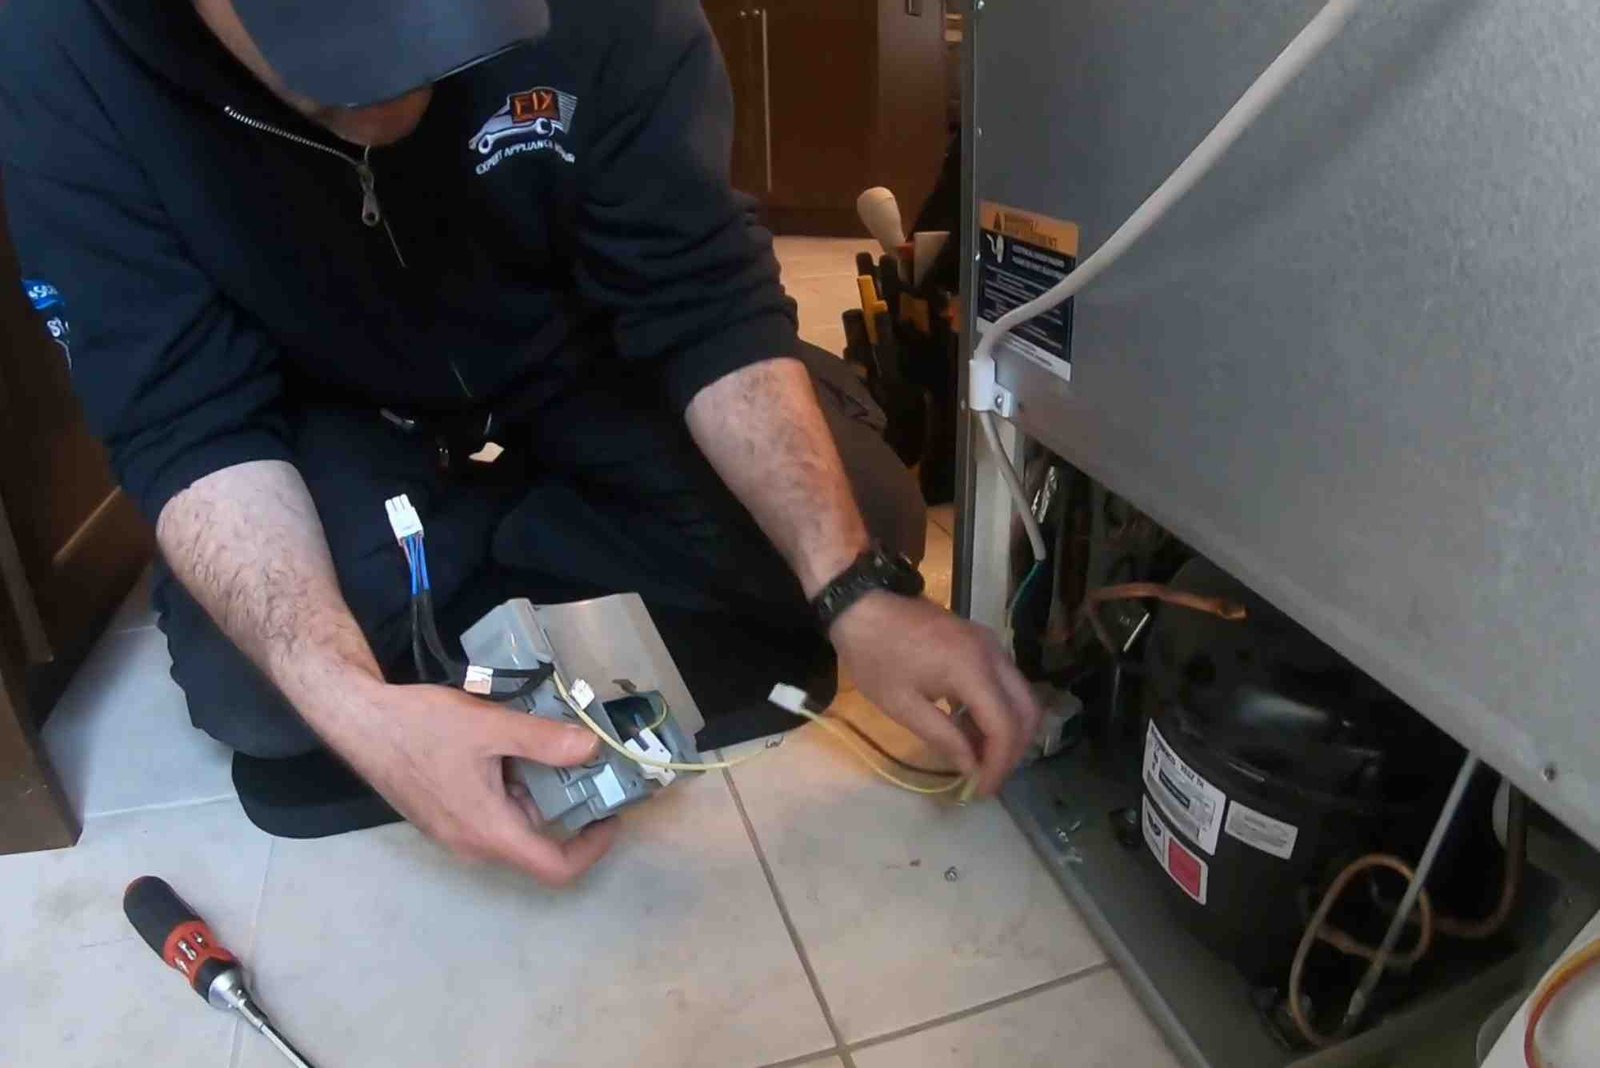
How To Repair Refrigerator Defrost Systems
Unplug and Prepare the Appliance
Safety comes first. Before starting any repair, unplug the refrigerator. Remove perishable food and store it in a cooler or secondary fridge. This ensures safety and gives you space to work efficiently.
Access the Defrost Components
Most defrost parts are located behind the freezer’s back panel. Use a screwdriver to remove the panel and expose the evaporator coils, heater, and thermostat. Be cautious — sharp metal edges can cause injury.
ADS
✓ Banner Ads
✓ Sponsored Posts
✓ Homepage Ads
Inspect the Defrost Heater
The defrost heater melts ice during the defrost cycle. Check it for visible signs of damage or burns. Use a multimeter to test for continuity. A faulty heater will show no continuity and needs replacement. Replacing it is straightforward — disconnect the wiring harness, remove the mounting clips, and install a new heater in the same position.
Test the Defrost Thermostat
The thermostat monitors coil temperature and activates the heater as needed. When it fails, frost builds up unchecked. Test it with a multimeter set to the continuity mode. If it doesn’t show continuity when cold, replace it. The thermostat is often clipped onto the evaporator coil, making it easy to remove and install.
Check the Defrost Timer or Control Board
Older models use a mechanical defrost timer, while modern units rely on an electronic control board. If your heater and thermostat test fine, the timer may be stuck. Rotate the defrost timer manually until the refrigerator enters defrost mode. If it doesn’t, it’s likely defective. Replace it following the manufacturer’s instructions. For electronic control boards, visual inspection for burnt or corroded spots can reveal issues.
Clean and Reassemble
After replacing any faulty part, clean the coils and interior surfaces to remove residual frost or debris. Reinstall the back panel, plug the refrigerator back in, and monitor its performance for 24 hours. The cooling cycle should return to normal, and frost buildup should cease.
For more expert techniques and insights, visit How To Repair.
Expert Tips for Effective Defrost System Repair
Repairing refrigerator defrost systems isn’t just about replacing parts — it’s also about understanding maintenance. Here are a few expert insights:
-
Always replace components with OEM parts to ensure compatibility.
-
Keep door seals clean to maintain consistent internal temperature.
-
Avoid overloading the freezer — blocked airflow promotes frost buildup.
-
Regularly inspect your refrigerator’s rear coils for dust or debris.
-
If problems persist after replacing parts, consider testing the control board or wiring harness.
These small preventive steps extend your refrigerator’s lifespan and improve energy efficiency.
Common Mistakes to Avoid During Repair
When learning How To Repair Refrigerator systems, many people make simple but costly mistakes:
-
Skipping diagnostics: Replacing parts without testing them leads to unnecessary expenses.
-
Ignoring airflow issues: Frost buildup isn’t always electrical — poor airflow can mimic defrost failure.
-
Neglecting cleaning: Failing to clean coils and vents after repair can cause future malfunctions.
-
Using incompatible parts: Non-OEM replacements can damage your appliance or void warranties.
A careful approach ensures lasting repairs and consistent performance.
Preventive Maintenance for Defrost Systems
Prevention is always easier than repair. Schedule regular checks every 6 to 12 months to inspect your refrigerator’s defrost cycle. Simple habits like keeping the freezer door closed tightly and cleaning the vent openings help avoid frost accumulation. Use a soft brush or vacuum to clean condenser coils at least twice a year.
Maintaining proper temperature settings (37°F for the fridge and 0°F for the freezer) also ensures the defrost cycle functions efficiently. These small actions prevent many defrost-related issues before they start.
While basic repairs are manageable, some problems require professional help. If your refrigerator still fails to defrost after replacing key parts, or you notice electrical burn marks, it’s time to call a technician. Complex control board or wiring issues demand specialized tools and knowledge.
Remember, hiring a certified technician ensures safe and reliable repairs that restore your appliance’s full functionality.
Real-World Example
A common case involves refrigerators that freeze food in the fresh food section. Upon inspection, the cause is often a defective thermostat not signaling the heater to activate. Replacing it immediately restores normal operation. This demonstrates how a small malfunction can impact the entire cooling system.
Learning How To Repair Refrigerator systems properly means understanding these relationships between parts and symptoms.
FAQs
How often should my refrigerator defrost automatically?
Most modern refrigerators defrost every 8 to 12 hours, depending on model and usage frequency.
What happens if I ignore frost buildup?
Ignoring frost accumulation leads to airflow blockage, higher energy bills, and eventually compressor failure.
Can I manually defrost my refrigerator?
Yes, you can unplug it and let the ice melt naturally, but this is a temporary fix. The root cause still needs addressing.
How do I know if my defrost heater is working?
If the coils remain frozen after a full defrost cycle, your heater likely isn’t functioning. Test it with a multimeter for continuity.
Are electronic control boards repairable?
Sometimes. If damage is minor, components can be replaced, but most technicians recommend full board replacement for reliability.
Is it safe to repair a refrigerator myself?
Yes, if you follow safety precautions and use proper tools. However, electrical repairs should only be attempted if you’re comfortable working with wiring.
For additional home maintenance insights, you can Read more on www.goodhousekeeping.com.
Knowing How To Repair Refrigerator Defrost Systems gives you confidence and control over one of your most essential home appliances. With the right tools and careful attention to detail, most defrost issues can be resolved without costly technician visits. Always test before replacing parts, maintain cleanliness, and use OEM replacements for lasting performance.
If you want to learn more in-depth repair strategies and home maintenance guides, visit How To Repair Refrigerator for expert advice. Keep your refrigerator frost-free, energy-efficient, and reliable for years to come.