Introduction
When you bring home the West Elm Wright Bed, you’re not just installing furniture—you’re embracing a statement piece that exudes sleek, mid‑century modern character. Guided by design fluency and quality craft, this bed is poised to transform your bedroom into a haven of elegance. Elevating your bedroom means paying attention to both form and function. The focus keyword The Elegance Of The West Elm Wright Bed appears naturally here because this bed isn’t simply a place to sleep—it’s a design centerpiece. From unpacking and assembly to pairing décor and maintenance, each stage matters. With clear steps and helpful tips, you’ll achieve a professionally styled look without the stress.
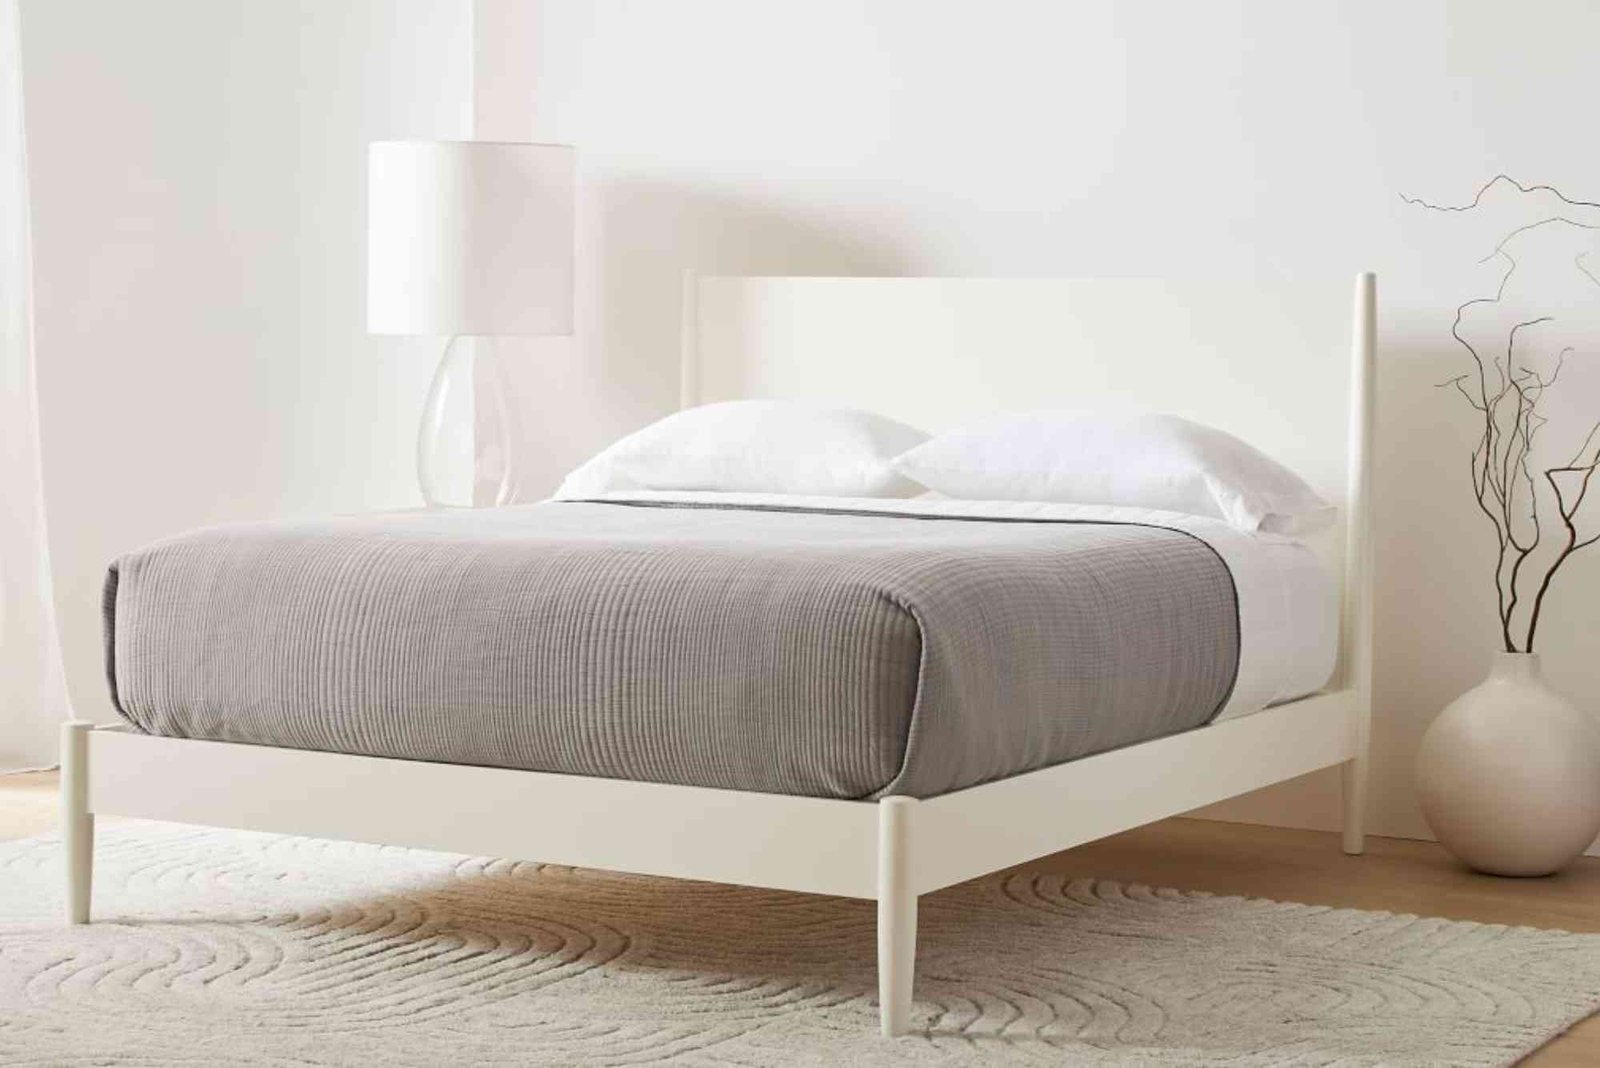
Why the Wright Bed stands out
Design and quality
The Wright Bed is crafted with kiln‑dried solid mahogany wood legs and a walnut–veneered frame. Its headboard is set at a slight angle to provide more comfortable back‑support for reading or relaxing.
Style versatility
Whether you favour modern minimalism or cozy warmth, this bed adapts. Neutral upholstery versions allow it to blend with colour palettes, while the wood finish brings organic texture. The angled headboard makes a subtle statement, giving the room a stylish edge.
Sustainability and build
The bed uses materials from responsibly managed forests and meets low chemical emissions standards. That means you get design and conscientious build quality in one.
Setup for The Elegance Of The West Elm Wright Bed
Pre‑assembly preparation
Space measurement
Measure your room carefully, allowing for the bed’s overall dimensions. For example, the Queen size has an overall width of around 65 inches, depth around 93 inches, and height around 46 inches. Ensure you have clearance around the sides and foot for walking and furniture placement.
Unpacking & checking components
When your delivery arrives, unpack all boxes and lay out hardware and parts. This allows you to inspect for any damage and confirm all pieces are present.
Clear the area & gather tools
Clear the bed’s intended space, remove any previous bed base if needed, and gather a screwdriver or Allen wrench, a rubber mallet if recommended, and any other required tools. Ensure a clean, flat surface to assemble the bed safely.
Assembly process
Attaching headboard to side‑rails
Securely join the headboard to the side rails following the manufacturer’s instructions. Tighten bolts carefully to avoid damaging the wood or veneer. The angled headboard should lean back toward the room.
Installing footboard and support slats
Connect the footboard, then insert the engineered wood support slats and install the middle‑support legs. Make sure slats are evenly spaced and flush with the side rails for even mattress support.
Placement and stabilising
Once assembled, place the bed in position by lifting it rather than dragging. Periodically check and tighten hardware after initial use, as looseness can lead to squeaks.
Styling for elegance
Choose bedding and textiles
Opt for crisp linens and a contrasting throw to highlight the bed’s clean lines. The angle of the headboard offers a subtle silhouette—keep pillows neat and symmetrical for maximum impact.
Nightstands and lighting
Flank the bed with nightstands that complement its mid‑century aesthetic. Add table lamps that provide soft ambient light and emphasise the headboard’s lean.
Wall and décor coordination
Since the bed is a focal point, keep wall décor restrained. A single oversized piece or two balanced prints work well. Keep clutter minimal to preserve the sense of elegance.
Floor space and scale
The depth of the bed means you’ll want at least two to three feet of clearance from the footboard to the wall or other furniture. This way, the design has room to breathe and impress.
Maintenance for lasting elegance
Regular dusting and inspection
Use a soft, dry cloth to dust the wood legs and rails. Upholstered versions can be vacuumed on low with a soft brush attachment. Every few months, inspect bolts and joints and retighten if needed.
Handling minor squeaks
If you notice squeaking, check whether the slats are snug The Elegance Of The and the bed is level. A felt pad between the bed base and floor or tightening of bolts may resolve the issue.
Long‑term care
Avoid dragging the bed when repositioning. If moving house or refurbishing your room, disassemble in reverse order, keeping small hardware sealed in labelled bags. This ensures you can re‑assemble with the same care.
If you’re ready to embrace The Elegance Of The West Elm Wright Bed, you now have a clear, step‑by‑step roadmap—from planning and unpacking to styling and upkeep. Taking the time to set it up properly ensures the bed doesn’t just look great—it performs beautifully The Elegance Of and lasts for years. Explore styling ideas, maintain its elegance, and enjoy the transformation of your bedroom. Check out our Related article on discoveran.com for more design inspiration and tips. Elevate your bedroom today with the Wright Bed.
FAQs
Q: Is the Wright Bed compatible with an adjustable base?
Yes. The frame is compatible with an adjustable base.
Q: What mattress height works best for this bed?
Since the headboard angles back and the side rails measure about 15 inches from floor to top, a mattress height of 10–12 inches is ideal.
Q: Does the angled headboard take up more space?
Yes. The angled headboard extends further back than traditional beds, so confirm you have adequate room behind the bed.
Q: Can I pick different fabrics or wood finishes?
Yes. The Wright Bed is offered in multiple finishes and upholstery options.
Q: Does assembly require professional help?
The instructions are clear and most handy people can manage it. However, professional delivery services can set it up for you.